Weekly Meeting 2019-09-10
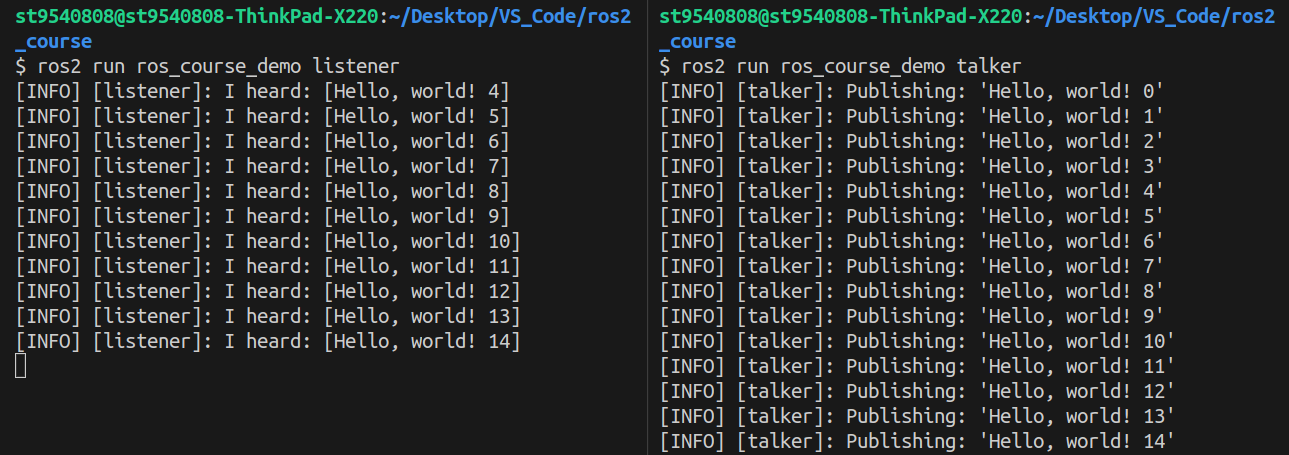
在我的上一篇文中實作了最簡單的 publisher 和 subscriber,而當中的 callback 是使用 C++11 lambda。
現在就開始作一個簡單的效能分析,目標是量測從一個 node 發布一個字串到另一個 node 上之間的延遲 (latency),其中會需要找到兩個 callback 的 symbol,因為 C++11 lambda 會是一個 unnamed object,每一個 lambda 都有自己的類型,要找到對應的 lambda 函式執行的位址 (其實是 unnamed object 定義的 operator()) 會相當困難,便改成以 member function 實作。
Notes
Rewrite C++11 lambda callback function into class method.
subscriber:
1 |
|
rclcpp::Node::create_subscription requires callback functions to be type of function object.
function object (or functor) is a class that defines operator()
callback() is non-static member function, so it’s required to pass this pointer.
std::bind(&Listener::callback, this, std::placeholders::_1) |
publisher:
在 19 行可依照需求調整發送頻率,我在測量延遲時是用 50ms。
1 |
|
Measure latency on the same machine
Environment
Distro: Dashing Diademata
OS: 18.04.1 Ubuntu
CPU: Intel® Core™ i5-2520M CPU @ 2.50GHz (2C4T)
At ROS2 workspace. The executables are placed under install directory.
$ ls |
path of talker (publisher) and listener (subscriber):
ros_course_demois the package name.
| Executable | path |
|---|---|
| talker | install/ros_course_demo/lib/ros_course_demo/talker |
| listener | install/ros_course_demo/lib/ros_course_demo/listener |
Find out the symbol for callback()
目標是找到 Talker::callback() 在 ELF 檔中對應的 symbol
List all exported symbols in the executable.
$ objdump install/ros_course_demo/lib/ros_course_demo/talker -t |
C++ uses name mangling to handle classes, templates, namespaces, etc. Use c++filt to demangle symbols:
$ objdump install/ros_course_demo/lib/ros_course_demo/talker -t \ |
Retrieve the symbol in ELF file for Talker::callback() using address 0000000000008944.
$ objdump install/ros_course_demo/lib/ros_course_demo/talker -t \ |
其實要找到 demangled symbol 只需要使用 $ nm -C 就可以了,感覺根本不需要這麼複雜。
Register probe function
使用剛剛找到的 symbol 並將其帶入 attach_uprobe() 便能完成註冊,一旦 Talker::callback() 被呼叫,註冊的 talker_probe 就會被執行。 更多 uprobe (在 userspace 追蹤程式) 的相關的資訊請看底下 References。
b.attach_uprobe(name="./ros2_course/install/ros_course_demo/lib/ros_course_demo/talker", |
Measure latency
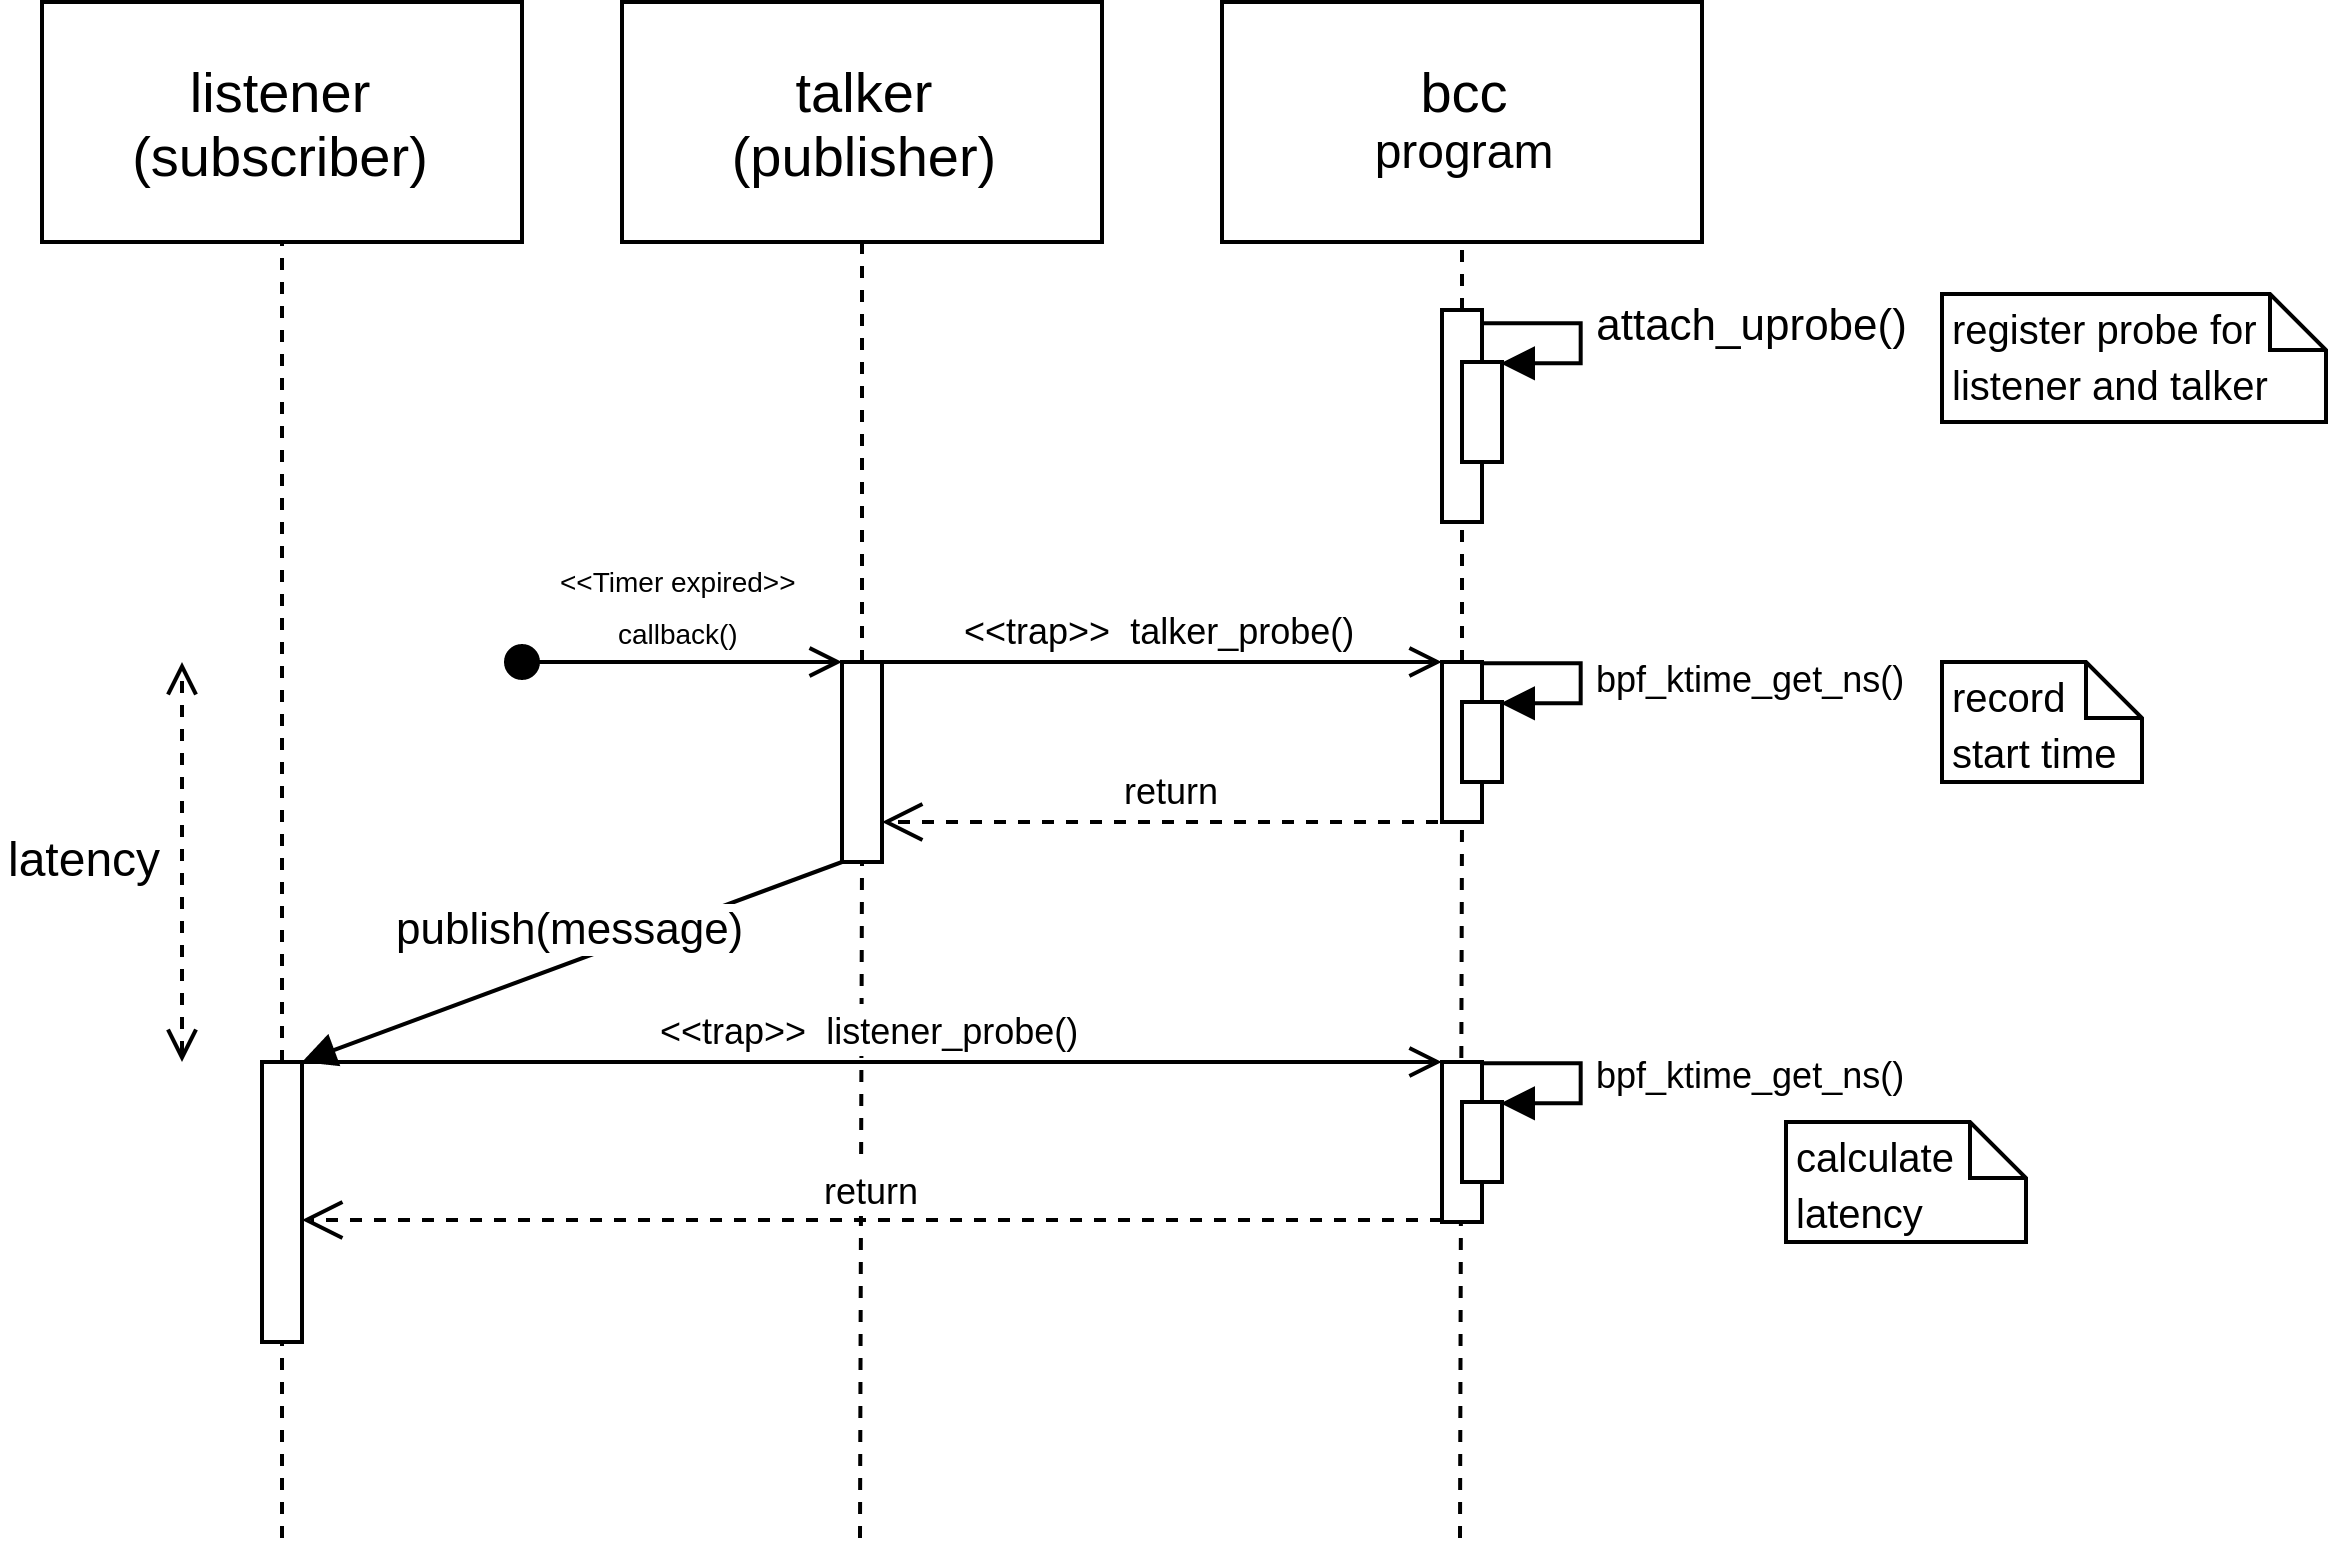
以下為測量方法的時序圖。
首先使用 uprobe 註冊 talker 和 listener 探針函式,分別會在 callback 被呼叫時執行,並測量兩個 callback 之間的時間差。
寫一個 eBPF 的程式追蹤兩個 callback 的呼叫時間:
#!/usr/bin/env python |
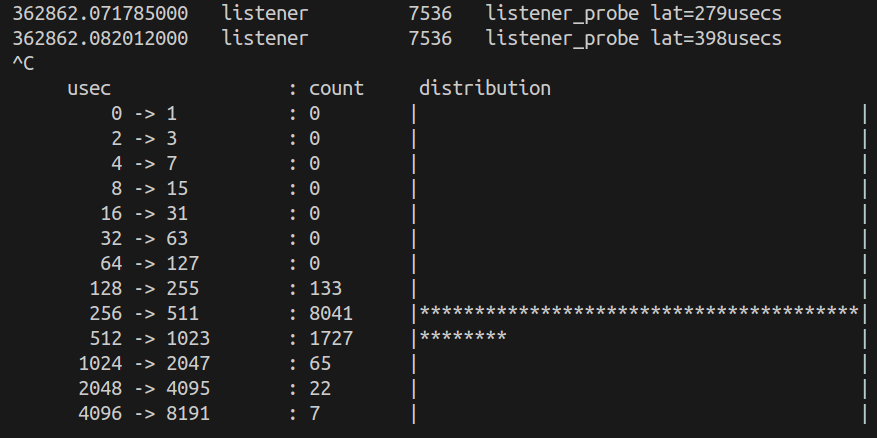
以下為統計結果,每次均 publish 一個長度為 21 的字串。
Future work
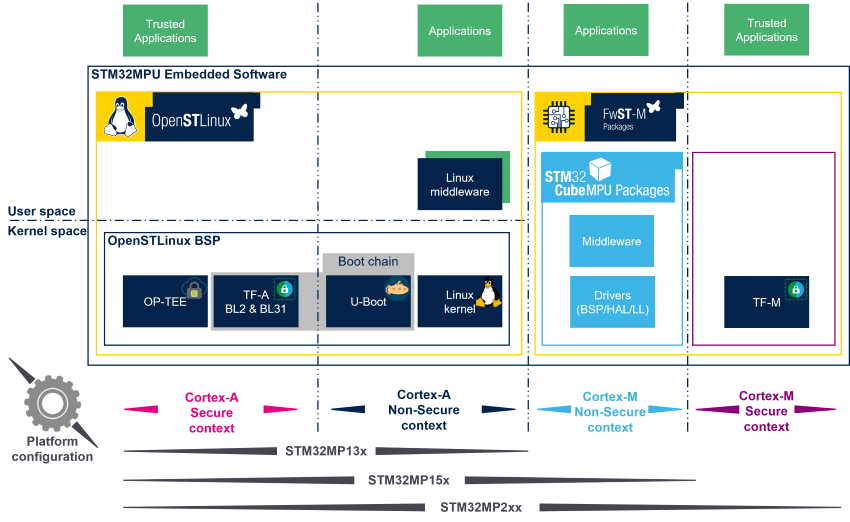
STM32MP157A-DK1

STM32MP157 dual Cortex®-A7 32 bits + Cortex®-M4 32 bits MPU
openSTLinux kernel 4.19
Build a PREEMPT_RT kernel for stm32mp1
Cross compile ROS2 for ARMv7
References
- BPF In Depth: Communicating with Userspace
- https://blogs.oracle.com/linux/notes-on-bpf-3
- kprobes
- https://www.kernel.org/doc/Documentation/kprobes.txt
- uprobe-tracer
- https://www.kernel.org/doc/Documentation/trace/uprobetracer.txt
- Meet cute-between-ebpf-and-tracing
- https://www.slideshare.net/vh21/meet-cutebetweenebpfandtracing
- iovisor/bcc
- https://github.com/iovisor/bcc